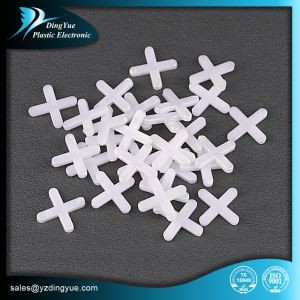


Can You Reuse Tile Spacers?
That bag of plastic crosses sitting in your toolbox after a tiling job looks perfectly fine. The thrifty instinct kicks in: can you reuse tile spacers for your next project? The answer isn't a simple yes or no-it depends on the type of spacer, its condition, and how it was removed. This guide separates fact from fiction, explains exactly when reuse makes sense, and helps you make the right call for quality and cost.

Introduction: The Reuse Question Everyone Asks
Tile spacers cost only a few dollars a bag, yet they have an outsized effect on your finished job. After a project wraps up, you're left with a pile of plastic crosses or T-shapes that look undamaged. Throwing them away feels wasteful. But reusing them blindly can compromise your next installation.
The truth lies in the middle. Plain cross and T-spacers can be reused if you remove them at the right time and they remain intact. Purpose-made reusable spacers are specifically engineered for multiple projects. However, once thinset cures around a spacer or it gets bent, its spacer longevity is over-for quality work, it belongs in the trash.

This article debunks the most common myths, lays out the real facts about disposable vs reusable spacers, and gives you a clear decision framework.
Myth vs. Fact: What You've Heard About Reusing Spacers
Myth 1: "All tile spacers are single-use only."
Fact: Plain cross and T-spacers are reusable if you remove them before the thinset sets, which saves money on big jobs. Pull them out within the working time, wipe off any wet mortar, and drop them in a bucket to use in the next section. Once thinset has cured around a spacer, leave it; prying it out can shift the tile. Purpose-made reusable spacers take this further-they're designed with robust plastic specifically for repeated use across multiple projects.
Myth 2: "A spacer that looks clean is ready to reuse."
Fact: Looks can deceive. Even after wiping, microscopic adhesive residue can remain. If a spacer appears bent, cracked, or misshapen, it is best to discard it immediately as it may compromise the integrity of your tile installation. Used spacers may have adhesive residue remaining, affecting their performance in future installations. Additionally, previous bending or wear during use can lead to inaccurate spacing.
Myth 3: "It's fine to grout over spacers to avoid removing them."
Fact: Absolutely not. Leaving spacers flat under the surface and grouting over them is the most frequent error; the plastic shows as a faint cross and the grout cannot bond there. If you remove them too soon, the tiles may shift and not align properly. However, if you leave them in for too long, they might get stuck to the adhesive, making them difficult to remove. Needle-nose pliers can also help grip the spacer and pull it out of the gap.
Myth 4: "Reusing spacers always saves money."
Fact: It saves money if the spacers are in good shape. But the cost of a fresh bag is only a few dollars. For optimal results, consider using new spacers for each project. This will ensure that your installation benefits from precise, consistent spacing, contributing to the overall durability and appearance of the tiled area. Buying a generous bag of cheap cross spacers up front means you never have to stop mid-job to wait for spacers to free up.
Myth 5: "You can reuse leveling clips too."
Fact: Leveling clips are single-use and snap off after curing, though the reusable wedges or caps can be used again. Mixing up these two components is a common rookie mistake.

Understanding Spacer Types and Their Reusability

Type 1: Standard Plastic Cross Spacers
The most common type. Made from polymeric material, these are technically reusable if:
- Removed within the working time (before thinset fully cures)
- Not embedded in cured mortar
- Free from bends, cracks, or misshapen arms
- Thoroughly cleaned of all adhesive residue
Realistically, they can be reused for up to two to three projects depending on their condition. Beyond that, wear and tear causes them to lose shape and effectiveness.
Type 2: T-Spacers
Used where three grout joints meet (staggered brick-bond patterns). Same reusability rules as cross spacers. Remove carefully, clean thoroughly, inspect for damage.
Type 3: Purpose-Made Reusable Spacers
These are a different breed entirely. Manufactured from durable plastic with a robust design, they're engineered for the sole purpose of repeated use. According to manufacturers like Levelit, these spacers:
- Maintain consistent grout joint widths across multiple projects
- Can be removed after the adhesive cures, cleaned, and reused
- Work for both floor and wall tile installations
- Are available in standard sizes (2 mm, 3 mm, 4 mm, etc.)
These are the true reusable tile spacers-designed from day one for a long spacer longevity lifecycle.
Type 4: Leveling Clips and Wedges
A hybrid situation:
- Clips: Single-use. They snap off after curing, leaving a small remnant under the tile edge.
- Wedges/Caps: Reusable. The wedges can be removed early and used again on future projects.
Type 5: Leave-In Spacers
Some proprietary systems are designed to stay in place permanently, integrated into the grout or mortar. These are common with mosaic mesh sheets or specific edge pieces. They aren't "reused"-they're permanent.
The Critical Factor: Removal Timing

Whether you can reuse tile spacers depends entirely on when you remove them. The window is narrow:
The Ideal Removal Window
Plastic cross and T-spacers should typically be removed once the thinset has set but not fully cured, usually between 4 and 24 hours. This window allows the thinset to hold the tiles while still permitting spacer extraction without damaging the setting mortar. Some references note the optimal time is when the tile adhesive is still soft but has become firm enough to securely hold the tiles, which typically occurs around 30 minutes after laying the tiles.
Why Timing Matters So Much
| Removal Time | Outcome | Reusable? |
|---|---|---|
| Too early (<20-30 min) | Adhesive hasn't gripped; pulling can shift tiles and disrupt grout joint width | Spacer is fine, but tile work is compromised |
| Ideal window (after thinset sets but before fully cured, usually 4-24 hrs) | Clean extraction, tiles stable | Yes-perfect condition for reuse |
| Too late (after thinset fully cures) | Spacer legs are locked in mortar; prying can shift tiles or snap the spacer | No-if you can remove it at all; often must be left in and covered by grout |
Warmer conditions accelerate setting; cooler or wet conditions slow it down. Large-format tiles, slabs, and heavy stone require longer cure times-24 to 72 hours-because the thinset needs more time to develop enough strength to resist shifting.
How to Properly Clean and Store Spacers for Reuse
If you've successfully extracted spacers within the ideal window, here's how to maximize their spacer longevity:
Step 1: Immediate Rinsing
After removing tile spacers, rinse them to clean off any residue. Don't let thinset dry on them-it becomes exponentially harder to remove.
Step 2: Soak and Scrub
Soak them in warm soapy water immediately after use. Use a brush to scrub away grout or adhesive residue. This removes both visible debris and microscopic films that could affect future spacing accuracy.
Step 3: Thorough Inspection
Before reusing tile spacers, carefully inspect them for any signs of damage. If a spacer appears bent, cracked, or misshapen, it is best to discard it immediately as it may compromise the integrity of your tile installation. They must stay in their correct positions for about 20 to 30 minutes.
Step 4: Complete Drying
Rinse them thoroughly and allow them to dry completely before storing them. Any residual moisture can affect the adhesive's performance or promote mold growth in storage.
Step 5: Smart Storage
Store the tile spacers for future projects: Keep them in a bag, toolbox, compartment, or drawer in your workshop. For simplicity and organization, consider storing them alongside other tiling accessories. These reusable spacers can be kept safely in a toolbox.
Disposable vs. Reusable: Making the Right Choice
The decision isn't just about whether you can reuse tile spacers-it's about whether you should for your specific project.
Choose Reusable Spacers When:
- You're a professional or frequent DIYer tackling multiple projects
- You need consistent, precise joint widths across jobs
- You want to reduce plastic waste (environmental benefit)
- You're using purpose-made durable reusable spacers (like Levelit's X-spacers)
- Your spacers were extracted within the ideal window and remain in perfect condition
Choose Disposable (New) Spacers When:
- You're doing a one-time project and want zero risk
- Previously used spacers show any wear, bending, or residue
- You're working with large-format tiles where precision is critical (anything bigger than about 15 inches)
- You're a professional where a callback from uneven grout lines costs more than a bag of spacers
- The spacer was embedded in cured thinset (must be discarded)
Cost Reality: A bag of 100 standard cross spacers costs only a few dollars. For a tool that costs only a few dollars a bag, tile spacers have an outsized effect on the finished look of any tile project. Buying a generous bag of cheap cross spacers up front means you never have to stop mid-job to wait for spacers to free up. The cost of new spacers is trivial compared to the cost of redoing a flawed installation.
Factors That Affect Spacer Longevity
Several variables determine how many times a spacer can be reused:
1. Removal Technique
Gentle extraction preserves shape. Jerking, prying with excessive force, or using the wrong tool can bend arms or crack joints. Slide a chisel, scraper, or flat-head screwdriver under the horizontal arm of the spacer and apply gentle pressure to pop the tile spacer out of the gap. If a spacer gets stuck, don't grout over it. Instead, use a chisel, scraper, or flat-head screwdriver to try and separate the spacer from the adhesive. Needle-nose pliers can also help grip the spacer and pull it out of the gap.
2. Cleaning Thoroughness
Soak them in warm soapy water immediately after use. Use a brush to scrub away grout or adhesive residue. Rinse them thoroughly and allow them to dry completely before storing them. The presence of debris may interfere with the tile's alignment or leave unsightly marks on the grout.
3. Storage Conditions
Store them in a zip-lock bag. These reusable spacers can be kept safely in a toolbox. If any spacers are damaged during installation, it's best to discard them and replace them with new ones for future projects.
4. Thinset Type and Exposure
Rapid-set mortars cure faster and grip spacers more aggressively, making clean removal harder. Standard thinset gives you a wider window. Heavier tiles (large-format, natural stone) require longer cure times, increasing the risk that spacers lock in place.
5. Number of Reuse Cycles
It is generally recommended to reuse tile spacers for up to two to three projects, depending on their condition. Beyond this, the spacers will gradually degrade over time. Purpose-made reusable spacers can last significantly longer when properly cared for, but even they have finite lifespans.
Common Mistakes to Avoid
- Grouting over spacers: The #1 error. The plastic shows as a faint cross and the grout cannot bond there.
- Mixing spacer sizes: Using 2 mm in some joints and 3 mm in others creates visibly uneven lines. The eye catches the difference instantly.
- Pulling spacers too early: If removed too soon, the tiles may shift and not align properly. Wait until the adhesive has set enough to hold the tiles.
- Waiting too long: Leave spacers too long and they might get stuck to the adhesive, making them difficult to remove. If a spacer gets stuck, don't grout over it.
- Reusing damaged spacers: Previous bending or wear during use can lead to inaccurate spacing. If a spacer appears bent, cracked, or misshapen, discard it immediately.
- Reusing without cleaning: The presence of debris may interfere with the tile's alignment or leave unsightly marks on the grout.
- Relying on spacers alone for large tiles: For anything bigger than about 15 inches, spacers alone without a leveling system almost always leave lippage. Match the tool to the tile.
Environmental Considerations
From an eco standpoint, reusing spacers reduces plastic waste. Tile spacers are often made of non-biodegradable plastic materials. By reducing the number of spacers that end up in landfills, you contribute to a more sustainable future. However, this must be balanced against quality:
- Best practice: Use purpose-made reusable spacers designed for multiple projects
- Second best: Reuse plain cross spacers for up to 2-3 projects if they remain in perfect condition
- Acceptable: Dispose of worn spacers responsibly; some manufacturers produce recyclable or biodegradable spacers
- Avoid: Grouting over spacers-creates weak joints that fail, requiring full re-grouting (more waste and cost)
Frequently Asked Questions
Q1: Can I reuse tile spacers from my last project?
Yes, if they were removed within the ideal window (before thinset fully cured) and remain undamaged. Soak them in warm soapy water immediately after use. Use a brush to scrub away grout or adhesive residue. Rinse them thoroughly and allow them to dry completely before storing them. If a spacer appears bent, cracked, or misshapen, it is best to discard it immediately as it may compromise the integrity of your tile installation. Generally, reuse them for up to two to three projects depending on their condition.
Q2: What's the difference between reusable spacers and regular plastic spacers?
Regular plastic cross and T-spacers are technically reusable if removed within the working time and kept in good shape, but they can degrade after up to 2-3 projects. Purpose-made reusable spacers are manufactured from durable plastic with a robust design specifically engineered for multiple projects. They maintain consistent grout joint widths and can be removed after the adhesive cures, cleaned, and reused repeatedly.
Q3: How soon should I remove spacers to keep them reusable?
Typically, remove spacers once the thinset has set but not fully cured, usually between 4 and 24 hours. This window allows the thinset to hold the tiles while still permitting spacer extraction without damaging the setting mortar. If you wait too long and the thinset fully cures around the spacer, leave it; prying it out can shift the tile and the spacer cannot be reused.
Q4: Can I clean spacers with chemicals or in a dishwasher?
Soak them in warm soapy water immediately after use. Use a brush to scrub away grout or adhesive residue. Rinse them thoroughly and allow them to dry completely before storing them. Avoid harsh chemicals that might degrade the plastic. A simple warm soapy water soak and brush scrub is sufficient and safe.
Q5: Are leveling system wedges reusable even though the clips aren't?
Yes. Leveling clips are single-use and snap off after curing, though the reusable wedges or caps can be used again. The wedges can be removed early (within 4-24 hours) and reused on future projects. The clips, however, are designed to break off and must be discarded.
Q6: How many times can I reuse a spacer?
It is generally recommended to reuse tile spacers for up to two to three projects, depending on their condition. Purpose-made reusable spacers can be used multiple times, provided they are not damaged. Their lifespan depends on how they are used, removed, cleaned, and stored after each installation. Be mindful of the duration of use as the spacers will gradually degrade over time.
Q7: Is it worth reusing spacers or should I just buy new ones?
Buying a generous bag of cheap cross spacers up front means you never have to stop mid-job to wait for spacers to free up. For a tool that costs only a few dollars a bag, tile spacers have an outsized effect on the finished look of any tile project. If you're a professional or frequent DIYer, purpose-made reusable spacers make economic and environmental sense. For occasional one-time projects, buying new disposable spacers each time is inexpensive insurance for quality results.
Hot Tags: reusable tile spacers, China, manufacturers, suppliers, factory, customized, wholesale, buy, 1 16 Soft TPR Tile Cross Spacer, 1/16 Soft TPR Tile Cross Spacer, 2 0mm Hard Tile Spacer, 3 8 Tile Spacer, Different Sizes for Tile Spacer, Soft TPR 3 16 Tile Spacer