


The Master Blueprint for Flawless Joints: A Step-by-Step DIY Home Tiling Guide to Using Tile Spacers
The contemporary interior architecture and home renovation sectors are undergoing an unprecedented structural revolution. Accelerated by the global availability of high-grade porcelain, natural quartz slabs, and complex ceramic formats, property owners are increasingly stepping away from traditional, high-overhead general contracting fees. Instead, they are taking personal control of their spatial aesthetics. The modern Do-It-Yourself (DIY) tiler is no longer a hobbyist working with crude hand tools; they are precise home builders executing intricate kitchen backsplashes, geometric bathroom wet rooms, and sweeping open-concept floor plans that demand absolute geometric perfection.
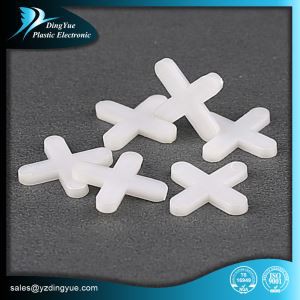
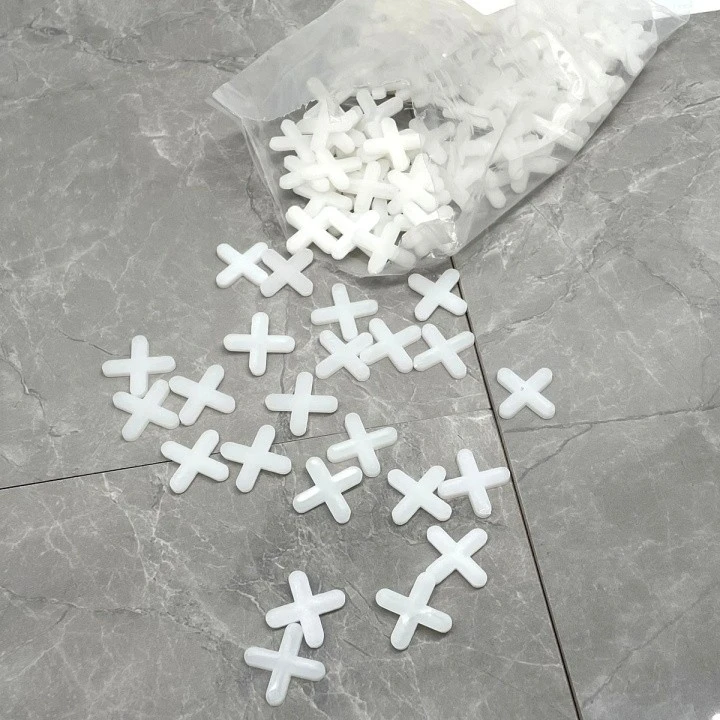
However, within the chronological flow of a floor or wall tiling installation, there is a deceptively simple component that acts as the ultimate gatekeeper of quality: the cross-industry humble tile spacer. To the untrained eye, these tiny cross-shaped plastic injection-molded components appear insignificant. Yet, failing to understand their mechanical application, polymer behavior, and geometric math is the number one reason DIY installations end up crooked, uneven, and plagued by structural failures. Attempting a tile installation by "eyeballing" the grout joints will inevitably lead to compounding spacing errors. These errors reveal themselves as unsightly crooked lines, misaligned corners, and catastrophic tile lippage.
To eliminate these risks, master tile setters and high-end DIYers treat tile spacing as a precise engineering discipline. As a premier global manufacturer with over 15 years of technical expertise in custom plastic injection molding, advanced polymer design, and automotive-grade IATF 16949 quality gate systems, Yangzhou Dingyue Plastic Electronics Co., Ltd. analyzes tile installation accessories through an uncompromising technical lens. Operating a massive 18,000-square-meter dual-factory complex with a daily manufacturing output exceeding 500,000 architectural accessory units, we understand the physics, structural stresses, and logistical dynamics behind perfect alignments. This exhaustive, master-level using spacers guide transforms complex structural math into a seamless, practical roadmap. It details advanced spacer installation steps, provides an extensive keyword expansion map for Google search optimization, and delivers an actionable blueprint to guarantee your DIY home tiling project achieves an elite, showroom-grade finish.
"Tile spacers are not optional cosmetic guides; they are structural insurance policies. They dictate the structural flexibility of a floor layout, allowing thin-set mortars and rigid porcelain to safely adapt to the micro-movements of a residential foundation."
1. The Structural Science: Why DIY Tile Spacers Are Mandatory

Managing Foundation Movement and Linear Thermal Expansion
To execute a flawless tiling project, a DIY installer must first discard the misconception that tile installations are completely static, rigid systems. In reality, every residential structure is in a continuous state of microscopic dynamic movement. Wood-framed subfloors deflect under fluctuating live loads, concrete slabs contract and expand based on moisture variations, and the tile units themselves change dimensions in response to seasonal temperature shifts-a physical metric known as the coefficient of linear thermal expansion.
If tiles are installed flush against one another without a continuous, uniform structural gap, they lack the physical space to expand. When the subfloor shifts or shifts under thermal stress, adjacent tile edges will grind directly into each other. This immense lateral pressure has nowhere to go but upward, causing the tiles to tent, crack, delaminate from the mortar bed, or violently pop off the floor. Incorporating high-quality DIY tile spacers guarantees that every single tile is isolated by a uniform, calculated grout channel. When filled with an appropriate polymer-modified or elastomeric grout, these channels act as structural shock absorbers. They absorb lateral stress vectors and protect the entire layout from structural failure over decades of use.
The Phenomenon of Compounding Dimensional Error
The second scientific rationale for utilizing a dedicated using spacers guide is the elimination of compounding dimensional error. Ceramic and porcelain tiles are manufactured via high-temperature kiln firing. This process introduces subtle factory variances in individual tile dimensions, known as sizing tolerances. While a size difference of 0.5mm between two tiles seems negligible, attempting to align them by eye will quickly ruin the project layout.
Without a mechanical spacer to normalize the grid, the installer will naturally compress or stretch individual lines to make the edges appear flush. By the time you tile across a simple 4-meter room, that tiny 0.5mm variance will compound exponentially into a massive 15mm misalignment. This structural drift causes grout lines to visibly curve, creates misaligned "T-junctions," and leaves you with awkward, highly noticeable wedge-shaped cuts at the far walls. Mechanical spacers isolate each tile within its own precise space. They absorb these manufacturing tolerances within the grout joints, ensuring the overall grid layout remains perfectly square and true.
Plastic tile spacers act as a localized mechanical reset button for your tiling grid. They prevent natural dimensional variations in individual porcelain slabs from cascading into massive, uncorrectable tracking errors at your project's perimeters.
2. Deconstructing the Spacer Matrix: Profiles, Thicknesses, and Materials
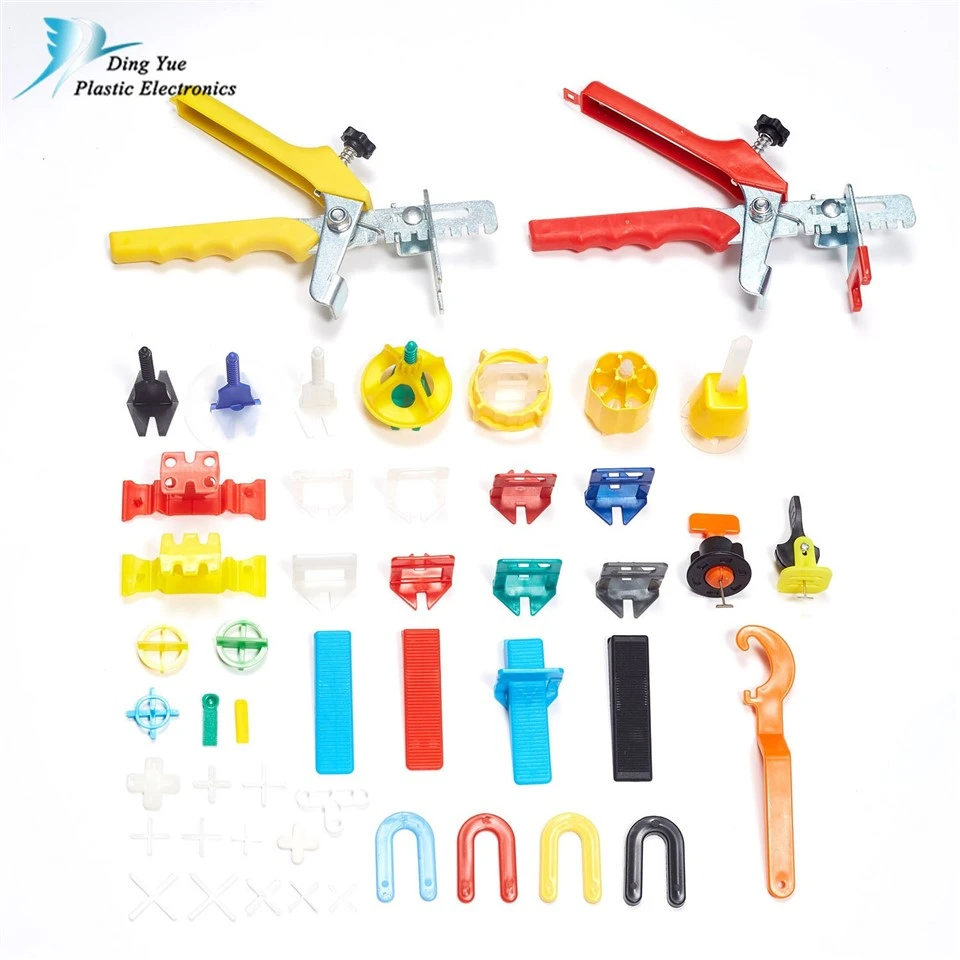
Cross, T-Shape, and Horseshoe Designs: Selecting the Right Profile

Modern architectural layouts require different tile configurations, each calling for a specific spacer profile to optimize installation speed and alignment accuracy.
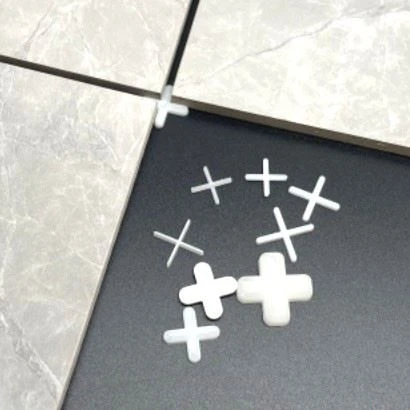
- Cross-Shaped Spacers: The traditional four-pronged configuration. This profile is engineered explicitly for standard straight-lay grid layouts (such as stack-bond square patterns). It sits directly at the intersection of four adjoining tiles, ensuring all four corners align perfectly in both the X and Y axes.
- T-Shaped Spacers: A three-pronged configuration designed for offset, broken-joint, or running-bond patterns (such as subway brick lay or wood-plank herringbone styles). The T-profile fits cleanly into the interlocking junctions, preventing the offset tile from drifting horizontally into the continuous grout line.
- Horseshoe Shims / U-Spacers: Solid, flat, horseshoe-shaped plastic shims. These are the preferred choice for heavy, vertical wall tile applications and large-format natural stone installations. Because of their wide, solid base, they can be inserted around anchor bolts or toggle systems, and they easily withstand high vertical compression loads without compressing or collapsing under the weight of heavy stone.
Mathematical Calibration: Sizing the Grout Joint Matrix
Selecting the correct width for your tile spacers requires balancing technical specifications with aesthetic goals. According to international ANSI A108 standards, grout joints must never be compressed below 1/16 inch (1.5mm). For standard residential walls using rectified subway tile, a 1/16-inch or 1/8-inch spacer delivers a sleek, minimalist look.
However, if you are installing large-format porcelain planks or rustic ceramic units with irregular edges, you must step up to a 3/16-inch (4.8mm) or 1/4-inch (6.3mm) spacer. The wider joint gives the installer the necessary structural margin to absorb dimensional variations in the tile shapes, ensuring a smooth, visually harmonious transition across the entire floor layout.
| Tile Category / Format | Recommended Spacer Width | Primary Engineering Rationale |
|---|---|---|
| Rectified Ceramic/Porcelain | 1/16" to 1/8" (1.5mm - 3mm) | Laser-cut edges allow for tight, minimalist joints with minimal dimensional variation. |
| Standard Non-Rectified Tile | 1/8" to 3/16" (3mm - 4.8mm) | Provides a sufficient buffer zone to blend slight factory pressing variances along the tile edges. |
| Large-Format Floor Planks (GPTP) | 3/16" to 1/4" (4.8mm - 6.3mm) | Essential for absorbing structural bowing common in long tiles, and allows for sufficient elastomeric grout volume to handle subfloor deflection. |
| Handcrafted / Rustic Saltillo Tile | 1/4" to 3/8" (6.3mm - 9.5mm) | Compensates for highly variable, organic edge profiles, transforming severe irregularities into a cohesive rustic design. |
The Virgin Polypropylene (PP) Advantage: Resisting Crushing and Deformation
For distributors and sourcing managers looking to protect their retail brand value, material science is a critical consideration. Many economy-grade spacers are manufactured using cheap recycled plastic or heavily extended regrinds. These inferior compounds have low structural memory and poor compressive strength.
When subjected to the lateral pressure of heavy porcelain or the vertical load of a large wall format, low-quality spacers will compress unevenly, leading to crooked joints. At Dingyue, we mold our entire professional line using premium, 100% High-Impact Virgin Polypropylene (PP). Our virgin polymers feature tightly controlled molecular cross-linking, which provides excellent flexural modulus and zero deformation under load. When a tile presses against a Dingyue spacer, the plastic maintains its exact engineered thickness down to the micron. This rigidity ensures flawless, predictable alignment from the first tile to the last.
3. Pre-Installation Engineering: Calculating Your Sourcing Volume
Before mixing your thin-set mortar and starting the spacer installation steps, you must calculate the total volume of spacers required for your project footprint. Running out of spacers midway through an installation is a serious issue; if the mortar begins to skin over and dry while you source more tools, the structural bond integrity of your project will be compromised.
The baseline mathematical formula to determine the total number of spacers needed is:
$$\text{Total Spacers Required} = \left( \frac{\text{Total Project Area in Square Meters}}{\text{Area of an Individual Tile in Square Meters}} \right) \times \text{Spacers Per Tile Component Indicator}$$
For a standard straight-lay installation where spacers are placed at every corner intersection, allocate approximately four spacers per tile. To account for jobsite losses, trimming errors, and peripheral wall adjustments, always add a 10% safety margin to your final volume calculation. If you are executing a running-bond brick pattern, increase this estimate to six spacers per tile to accommodate the extra support needed along the offset T-junctions.
4. Step-by-Step Execution: Master Spacer Installation Steps
To achieve a professional, lippage-free finish, follow this systematic field guide detailing the correct application methods for your spacing tools.
Phase 1: Subfloor Validation and Thin-Set Application Matrix
The foundation of any successful tiling project is a clean, sound, and flat subfloor. Ensure the surface is completely free of dust, oils, and drywall compounds. Mix your thin-set mortar to a rich, thixotropic consistency-it should hold sharp ridges when combed with a notched trowel without slumping. Apply the mortar to the substrate using the correct trowel size, combing the ridges in straight, parallel lines rather than swirling patterns. Straight ridges make it much easier to compress the mortar bed evenly and purge trapped air when embedding the tile.
Phase 2: The Vertical Insertion vs. Flat Placement Strategy

One of the most debated techniques in home tiling is the choice between placing spacers flat at the corner intersections or inserting them vertically like pegs between the tiles. Master craftsmen highly recommend the Vertical Insertion Method (Pegging) for residential DIYers.
 Technique</text><rect x='150' y='80' width='140' height='100' fill='%23bdc3c7' stroke='%237f8c8d' stroke-width='2'/><rect x='294' y='80' width='140' height='100' fill='%23bdc3c7' stroke='%237f8c8d' stroke-width='2'/><rect x='290' y='60' width='8' height='60' fill='%23e67e22' rx='2'/><text x='350' y='135' font-family='sans-serif' font-size='13' fill='%232c3e50'>Spacer inserted like a peg</text></svg> "product-1-1")
When you place a spacer flat at a four-corner intersection, it becomes deeply embedded in the wet thin-set mortar oozing up from the bed. If you forget to remove it before the mortar fully cures, the plastic spacer becomes permanently trapped. When you subsequently apply grout over the top, the grout layer over that buried spacer will be extremely thin. Over time, this thin layer will crack, flake off, and leave you with an unappealing spot where the white or gray plastic spacer shows through. By inserting the spacer vertically-placing two prongs straight down into the joint between the tiles-the body of the spacer stays completely clear of the mud bed. This keeps the spacer clean and makes it incredibly easy to pull out once the mortar sets.
Phase 3: Monitoring Wall Tiling and Creep Mitigation
When tiling a vertical surface, such as a bathroom wall or kitchen backsplash, gravity is your constant adversary. As you stack tiles upward, the weight of the upper rows exerts a continuous downward force on the rows below. If your thin-set lacks sufficient thixotropic grab, the entire wall assembly will slowly slide downward, a failure known as "wall creep."
To prevent this layout failure, use premium DIY tile spacers as structural supports along the bottom starter course. Insert two spacers vertically under each wall tile along your level ledger line. As you build upward, continue inserting spacers at every vertical and horizontal junction. The rigid virgin polypropylene structures transfer the heavy downward load directly to your ledger board, locking every tile in place and preventing vertical sliding. This structural support keeps your grout lines perfectly straight and uniform all the way to the ceiling.
5. The Critical Removal Window: Preventing Permanent Entrapment

Timing the Extraction Frame and Thin-Set Curing Cycles
The most time-sensitive phase of using tile spacers is knowing exactly when to take them out. You must never leave plastic spacers in the joints during the final grouting process. Plastic does not bond with cementitious or epoxy grouts, so leaving them buried creates structural weak points that cause the grout to crack and break down later on.
The ideal removal window opens approximately 12 to 18 hours after completing the tile installation, depending on your room's ambient temperature and humidity. You want the thin-set mortar to achieve its initial set so the tiles are locked firmly in place and will not shift, but you must extract the spacers before the mortar reaches full, rock-hard cure. If you wait too long (past the 24-hour mark), any mortar that managed to grip the prongs will harden completely, trapping the spacer and making extraction extremely difficult without damaging the tile edges.
Tool Strategies for Safe Extraction Without Chipping Tile Edges
If you followed the professional pegging method and inserted your spacers vertically, extraction is incredibly fast and simple. Grab the exposed portion of the spacer with needle-nose pliers or a specialized tile spacer removal tool, and pull it straight out with a smooth, vertical motion.
Never rock the tool sideways or pry against the tile face using the edge of the tile as a fulcrum. The glazed edges of ceramic and porcelain tiles are highly vulnerable to chipping under point-load pressure. If a spacer feels stuck because a bit of mortar hardened over its prong, use a sharp utility knife to carefully slice away the trapping thin-set before pulling. Once all spacers are cleanly extracted, run a stiff nylon brush or a joint cleaning tool through the open tracks to purge any residual debris. This step ensures your grout channels are clean, deep, and fully prepared to receive a solid, uniform application of grout.
6. Comprehensive Home Tiling Troubleshooting FAQ Panel
What should I do if a tile spacer becomes permanently embedded in the hardened thin-set mortar?
If you accidentally leave a spacer flat in a joint and it becomes locked in place by fully cured thin-set, do not attempt to pry it out with a screwdriver or chisel. Forcing it will inevitably chip the glazed edges of your tiles. Instead, use a sharp utility knife or a specialized rotary multi-tool equipped with a micro-grout removal blade to carefully trim away the upper prongs of the plastic spacer. Carve out a channel at least 2mm deep below the face of the tile. Once the plastic is recessed, vacuum out the loose debris. You can then pack that extra depth with a high-performance polymer-modified grout, completely hiding the buried spacer and preventing surface cracks.
Are plastic tile spacers reusable, or should they be discarded after a single installation?
Whether a spacer can be reused comes down to material quality and your extraction discipline. Cheap spacers molded from low-grade recycled regrinds often warp, stretch, or tear during extraction, making them unfit for another project. However, premium spacers molded from high-impact virgin polypropylene-like our professional lines at Dingyue-maintain their shape perfectly after removal. If you extract them cleanly within the 12-to-18-hour window and toss them into a wash bucket to clean off any wet mortar residue, you can reuse them across multiple projects. This durability provides an outstanding long-term return on investment for high-volume contracting teams and busy DIY property renovators.
How do I choose between standard plastic spacers and integrated tile leveling systems?
Standard plastic spacers and mechanical tile leveling systems serve different, complementary purposes. Standard spacers are engineered primarily to maintain consistent horizontal and vertical grout joint widths across your layout. They are highly effective for smaller tile formats, traditional subway tiles, and vertical wall mosaics. Integrated leveling systems (which use clips, wedges, or spin caps) are specifically engineered to eliminate vertical displacement-known as lippage-between adjoining tiles. Leveling systems are mandatory when installing modern large-format tiles, heavy natural stone, or long wood-plank porcelain. For these larger formats, you should use an integrated leveling clip to ensure a flat surface, while continuing to use standard spacers at the corners to keep your layout square.
Why is my wall tile layout slowly drifting downward despite using spacers?

Downward layout drift on a vertical surface is a clear sign that your thin-set mortar was mixed with too much water, or that you used a standard mortar lacking proper non-sag properties. When thin-set is too wet, it loses its thixotropic strength and cannot support the weight of the tiles. The heavy upper rows compress the lower rows, causing the tile layout to creep down and squeeze your spacers out of alignment. To fix this, always use a dedicated non-sag mortar designed specifically for large, heavy wall tiles, and strictly follow the manufacturer's mixing water ratios. Additionally, make sure you use rigid virgin polypropylene spacers or solid horseshoe shims that resist compression under heavy vertical loads.
7. Strategic Conclusion & Global Manufacturing Sourcing Blueprint
Achieving a flawless, showroom-grade tile installation is not a matter of luck; it is a direct consequence of your tool selections, material choices, and layout discipline. What seems like a minor detail-the selection and proper placement of a plastic spacer-is actually the foundation of your project's overall structural alignment and long-term durability. By adopting the professional vertical pegging method, accurately calculating your required volume, and timing your extraction window perfectly, you transform a challenging residential renovation into a smooth, successful victory.
For high-volume retail distributors, global home-improvement chains, and commercial material importers, supplying reliable, high-performance tools is the keys to building lasting customer loyalty. Sourcing your product lines from an unverified workshop that uses cheap recycled plastics introduces significant quality risks, including compressed joints, crooked layouts, and customer warranty claims.
Yangzhou Dingyue Plastic Electronics Co., Ltd. provides the robust, high-volume manufacturing capabilities your business needs to scale with confidence. Operating under strict automotive-grade IATF 16949 certification with an elite dual-factory setup, we guarantee that every single tile spacer we produce is perfectly uniform, dimensionally stable, and molded from 100% pure virgin polypropylene. Backed by a daily production capacity of over 500,000 units and a strategic 2-hour shipping pipeline to the international shipping hubs of Shanghai and Ningbo, we deliver the quality assurance and logistical predictability your business needs to lead the market.
Protect your brand reputation and optimize your landed costs today. Contact our international procurement team to schedule a virtual factory tour, review custom packaging options, or request a complimentary sample kit for your local market testing.
Core Sourcing & Operational Takeaways Checklist:
- Structural Stability: Never skip tile spacers; they ensure uniform grout channels that absorb residential foundation shifting and thermal expansion.
- Material Integrity: Mandate 100% high-impact virgin polypropylene (PP) formulas to prevent spacers from compressing or deforming under heavy floor loads.
- Vertical Pegging Method: Insert spacers vertically like pegs to keep them clear of the mud bed, ensuring clean extraction and preventing hollow grout zones.
- The Extraction Window: Always pull spacers within the 12-to-18-hour frame, after the thin-set has initially set but before it reaches full, rock-hard cure.
- Supply Chain Efficiency: Partner with an IATF 16949 certified manufacturer located near major deep-water shipping ports to guarantee consistent product quality and reliable shipping timelines.
Hot Tags: a step-by-step diy home tiling guide to using tile spacers, China, manufacturers, suppliers, factory, customized, wholesale, buy, 1 5mm T Shaped Tile Spacer, 1/16 Hard Tile Spacer, 2 5mm Hard Tile Spacer, 2mm Long Leg Tile Spacer, 3mm Long Leg Tile Spacer, Soft TPR 3 16 Tile Spacer